Thursday, October 17, 2024

Loosening Up With Mixed Media

(To view full post, you may need to click blog title and read in your browser.)

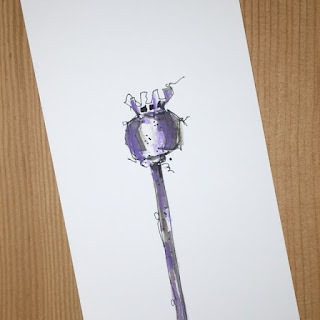
In late summer the poppies were beginning to die off and our garden was full of the most beautiful seed heads. I've always loved their elegant shape - my husband says they look like they are wearing crowns!

Their whimsy seemed to lend themselves to loose drawing. Here's the first one I did.

Using one of my 'a few lines' postcard blanks seemed a good format for a  skinny upright seedhead. And I did another drawing on the back side too. 

This quick 'sketchy' style of drawing is new for me (and pushed me outside the familiar) but it's exactly the direction I want to go. I'd also been wanting to experiment with some of the many, many art supplies I've accumulated over the years and never used.


I played around in a Canson 9x12-inch (about 23x30-cm) mixed media sketchbook with crayons and markers, smudging things with a bit of water here and there. Then I did one in my 'daily' sketch book.

Then I went back to the 9x12 sketchbook and started with a bit of collage (always whittling away at my stash of hand-printed paper).


Think I enjoyed the shapes more before I started adding mixed media to the collage. But there are possibilites for later exploration. The videos below, if you're interested, give an idea of the process without collage.

It was a challenge to draw and record myself at the same time! Here I'm using a pen with Noodler's Ink in Raven (not entirely waterproof) and a fine nib. Then I started adding a bit of colour with a Caran d'ache water soluble crayon, followed by a Faber-Castell PITT brush pen in grey.


I'd go on to add more markers, including the PITT pens but also a gold metallic Sharpie and a Crayola washable marker in grey. This fat marker for children made magic swiped over the Caran d'ache crayon. Think the kid markers are water based and that activated and blended wonderfully with the water soluable crayon. Here are a few examples:


The one below has a tiny bit of collage (the black stripes).


Think the earth-toned ones look elegant but I also had fun with wild, improbable colour too.


With this last one, I started blending two or more colours. The ochre crayon is just an inexpensive kids wax crayon. Anything goes for this process - you don't need expensive art supplies!


With these colourful postcards, I did more stash-busting and paired them with cheerful yellow envelopes. (The postcard blanks are cut to fit a standard #10 envelope, often called a business envelope.)


I played around with scale, too, making some of the seedheads large (there was a little more room then for adding media) and then sometimes drawing quite small.


Now, with the colder weather and grey days coming on, I can look back at these fun little sketches and remember summer!

Thursday, August 8, 2024

Dandelion Decade

 (To view full post, you may need to click blog title and read in your browser.)

There is nothing quite as cheery as a bright yellow dandelion. 


And it only took ten years to make these cards! A decade ago I came up with the idea to use craft foam to print some dandelions. This is as far as I got:


Not at all how I had imagined they would turn out. I remembering playing around with the plates for the flower and the leaves but nothing ever quite jelled. Eventually everything went into a box to be forgotten until I was doing a little studio clean. I found I still really liked the plates, and decided to have another go.


At the time, I had made "flower" shapes in three sizes with sticky-backed foam and stuck them to old CD cases. I used plastic binder dividers to back the leaves. Having a clear mount is handy when it comes to printing.


I chose patterned paper and printed more leaves and flower shapes (sorry, no flower photos).


Once they were dry, I cut them out and added to the old prints.


Immediately I was happier! The smaller patterned shapes (printed on Asian book pages) brightened the dandelion flower and provided some interest and colour contrast. I also liked how the paler original leaves made a nice background for the darker patterned leaves.


I played around with a dark centre. Not sure that added anything. And then moved to a square format.


I'd also printed the flowers on a pinky background and wondered what it would look like if I kept some of the pink:


Again, not sure about leaving some of the pink background but I did like the dots I added. Dots of colour always make me think of dancing sunlight.

In the end, I spent several days just experimenting with the flower and leaf shapes, feeling free to try this and that just to see what it looked like. For me, it's a plus working with pre-printed and cut-out shapes - I can move them around without committing to a compostion. 


Always fun to see new prints packaged and ready to head out into the world!


Glad I hung onto these old plates and had a chance to give the dandelions another go. A decade of playing around in the studio helped me see potential in the old prints and I had a bit more experience and confidence to relax and see what developed. Likely a lesson for life somewhere in there!

Thursday, July 4, 2024

Sticker Sillies!

(To view full post, you may need to click blog title and read in your browser.)

After making stickers with my logo (and other designs) for packaging, this is what I moved onto!


These little landscape notecards were such fun!


Stamp pad inks work great and have the bonus of drying quickly.


Using the stickers, rather than stamping directly to the notecard, let me play around with composition.


I tried various tree shapes.


Even gave wonky flowers a try.


Augmented the stickers with bits of collage added colour and/or pattern.


Can't decide if shadows added anything to the design...


With freedom to play around with shapes, pattern and composition, it's always a pleasure to develop a small series.


I'd like to say I "developed" this idea to have an easy project for little people to play around with (which it is - no messy inks or stamp pads!) but, in truth, I enjoyed cutting out the stickers and moving them around until I liked the composition. It was meditative and relaxing and there was something so satisfying in peeling off the backing and pressing the stickers in place!