(To read full post you may need to click post title and view in your browser.)
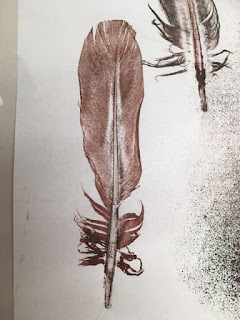
Continuing on from several weeks ago with inking feathers found in our forest or along the roadside, I was taken with the depth the multiple colours produced.
The feather below was inked in the grey-blue and printed. Ho-hum.
Another feather, inked with two colours, is a bit more exciting.
I find I need to ink and print each feather several times to build up enough saturation of colours to get a successful print (successful, as in a print I find pleasing). Quite quickly, though, the soft fluffy part of the feather begins to mat and clump, as you can see above.
For awhile I can separate the clumps with a pin but there quickly comes a point when the feather is done for. You'd think it would be a simple thing -- find a feather, ink it, print. Done. But natural stuff like feathers and leaves are notoriously difficult to print cleanly with no smudging or "halo" effect (caused when there's the tiniest bit of movement during printing).
So I print and I print, culling out the "duds", and am really happy if three-quarters of the prints are crisp and clean. This session went well and I ended up with these:
Here're two close-ups:
One thing with printmaking is the need for a lot of drying space! I've got a double clothesline in my studio and can peg up a good number of small prints to dry.
I also have these wire trays from a fruit dryer my husband build back in the seventies when we were first married and flirting with the back-to-the-land movement. The ancient electric heater we used caught fire and we lost our enthusiasm and dismantled what was left of the plywood dryer. But I kept the trays all these years figuring they'd come in handy one day.
Since I tend to work small this old re-purposed record rack holds about 4 dozen prints.
And these salvaged metal office sorters mounted under my work table come in handy.
I also purchased a rack on-line that's good for larger prints. Designed for elementary school art classes it's inexpensive (compared to professional print racks) but there are only two crossbars per wire shelf. Larger work might not lay perfectly flat and small work falls through but, if needed, I can layer each shelf with a sheet of poster-weight card stock.
I had the idea of storing the rack in a closet when it wasn't in use and my accommodating husband came up with a way to hang it on the side wall. It's easy to take down but I discovered the prints dry just fine in the closet.
Can you believe, though, with all these drying surfaces, sometimes I still end up using the floor? There is some truth to the idea no matter the size of the studio, it's never big enough!


